Choosing a bike for overland travel is both easy and difficult – literally anything can do a big trip (the most travelled bike in the world is an old Harley, and Sydney to London has been done on a 110cc postie bike before!) – however some choices are more practical, reliable and / or comfortable.
After some research, and considering the always-limited budget, I ended up with a 2012 Suzuki DR650. There are several reasons for this:
– The low technology nature of the bike (air cooled, carby fed, etc) means that roadside and ‘MacGuyver’ repairs are possible to fix pretty much anything – something that’s not usually possible with ECUs, injection systems, CANBUS electrics and immobiliser systems.
– It’s cheap! Brand new these bikes can be had for $8000 AUD, meaning a low km example that’s a few years old can be had for $6000. That’s less than half the equivalent price of one of the adventure-spec BMWs or KTMs.
– It’s been around for years. This model has been made and sold continuously since 1996, meaning that any usual problems or weaknesses (and there are a few) are well documented. There’s also very strong aftermarket support both in Australia and overseas, meaning that the bike can be modified in any way necessary.
Modifications
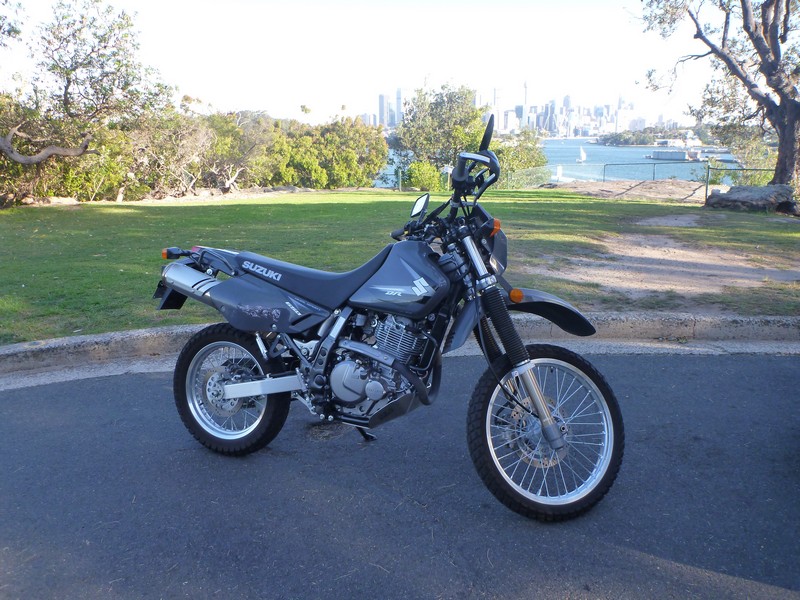
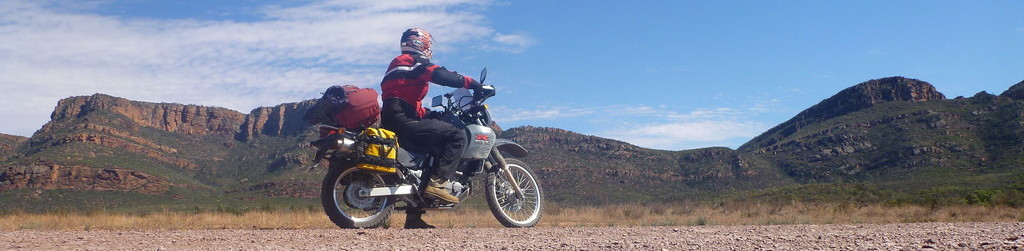
The bike, near-standard, as bought With some modifications, before leaving to tour Australia
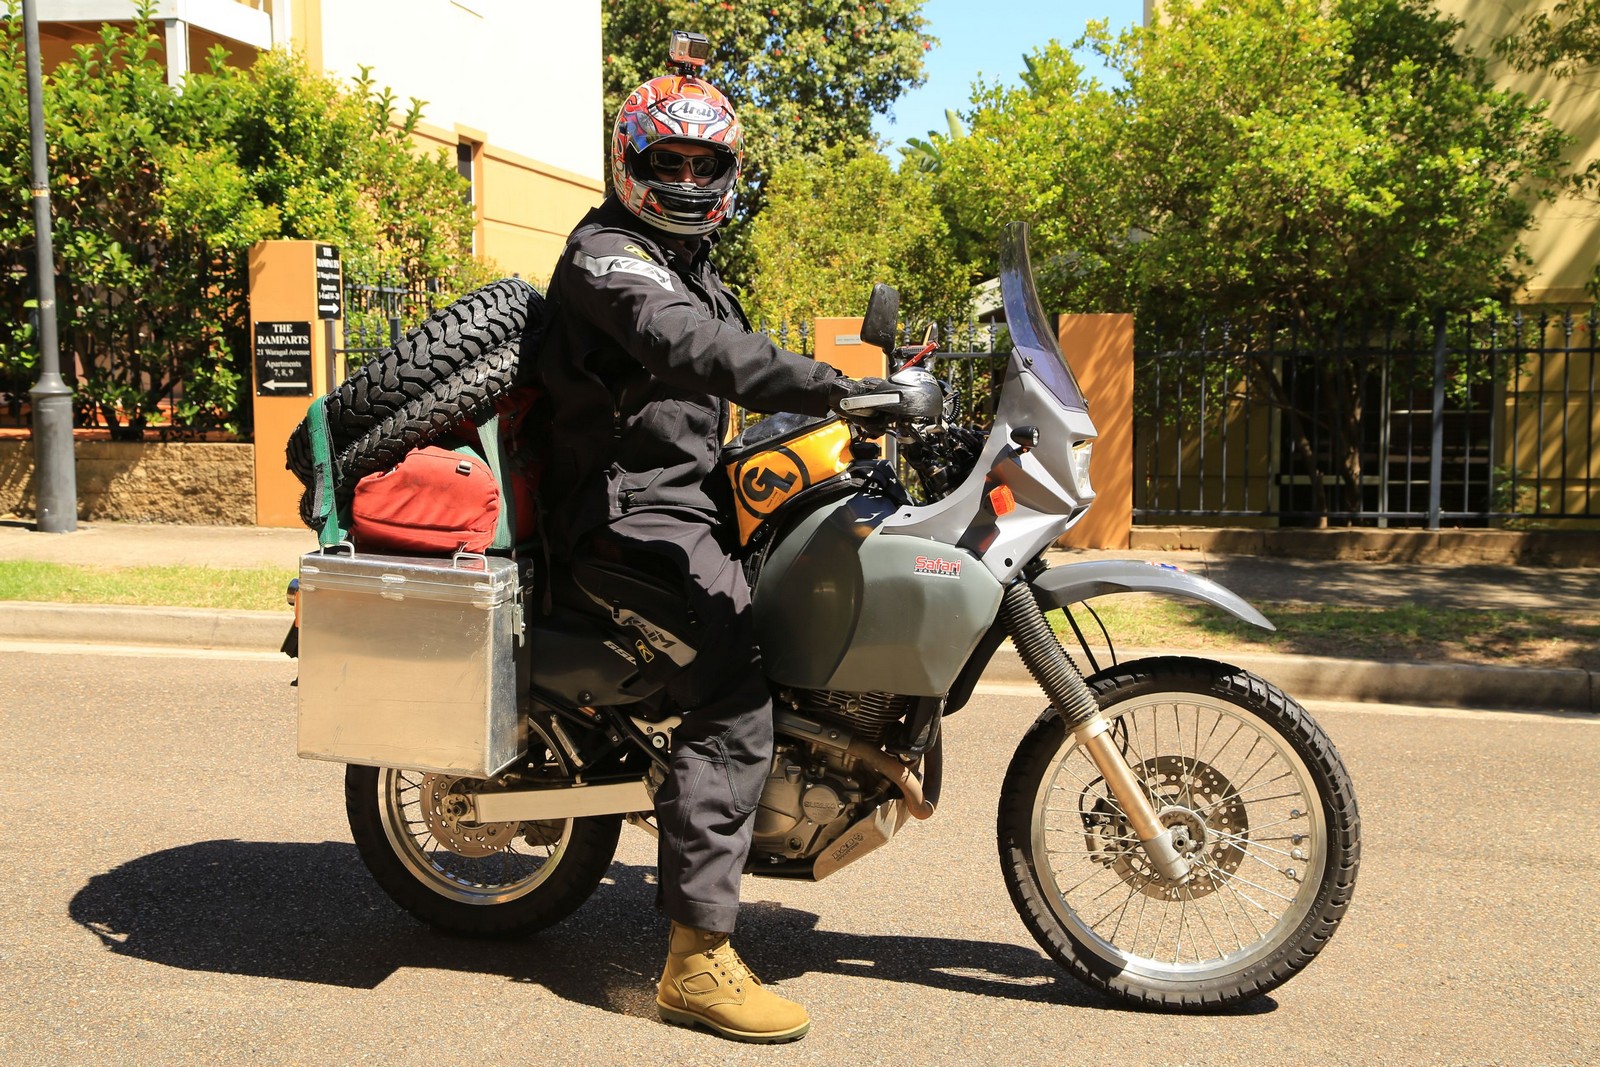 In its final (current!) iteration…
As part of preparing for each trip, I have made extensive modifications to the base bike. Here’s a list of what I’ve done:
Fuel Tank – 30L Safari tank. The original is only 13L, giving barely 220km range. The new tank (which has expanded further with time and heat to around 35L) increases that to around 500km. I’ve also fitted proper inline fuel filters, as the stock system is a tiny sock filter inside the fuel line – almost useless.
Safari fairing – A later addition, this allows both better wind protection and a more comprehensive dash layout.
Trailtech Vapor dash – the standard bike come with just a speedometer. The Vapor dash adds tacho, temp gauge, peak functions, even a clock which was previously lacking.
Windscreen – for the long highway stretches, a good windscreen is critical. This provides some protection from wind buffeting, rain etc.
LED headlight with relay – the standard headlight design is terribly weak. Adding a relay to the circuit allows it to be manually switched instead of being linked to the ignition, and the LED globe more than doubles the light output.
LED spotlights – instead of choosing large, high power spots, I have fitted very small spots that draw around 2W each. This means I can use them around campsites at night without fear of draining the battery, while still providing a useful boost in night visibility.
Aftermarket 7/8″ handlebars with Barkbusters – the standard handlebars are a soft mild steel that bends very easily, while the stock knuckle protectors are just plastic and only mount off the inside of the bars. The new bars with the barkbusters have survived many drops without issue, and provide good offroad protection to the hands.
Heated handgrips – until you’ve had them, you don’t know what you’re missing out on. These are a godsend on cold days, keeping enough warmth in your hand to still operate the controls safely.
Cruise control – a cruise control system is another critical comfort element for long highway stretches. With a friction-lock design counteracting the return spring, you can rest and move your right hand to prevent cramps, while still allowing you to close the throttle with it engaged if necessary.
Multiple power cables – outlets on both the dash and bars, with both USB and cigarette plug sockets, to provide charging and power to various devices. I’ve hooked up most of these through SAE connectors, which are a foolproof and weatherproof connector.
B&B bashplate – strong, solid alloy protection for the sump and engine. Has had many workouts already and has come through every time.
Case Armour – stick on alloy plates on the engine cases provide some peace of mind that a stray rock (or gear lever during a drop) won’t crack them.
Front sprocket cover – the standard item is plastic, whereas the steel replacement will actually stop the chain from cracking the cases if it comes off (and I’ve had it spit the chain out once already when the master link failed!)
Suspension – I gave the bike to the experts at Teknik in Penrith overhaul the suspension, mostly increasing the spring rates and oil weight to cater for the increased weight of myself and all the luggage.
Pannier racks – locally made Barrett steel racks are a multi-fit design suitable for both soft luggage (as per the Australian trip) and hard boxes, and include a cross brace across the rear.
Panniers – I started with a set of Wolfman Expedition waterproof panniers, which I would happily recommend, however for Sydney to London I wanted both more space and the ability to lock them. Locally made Barrett alloy panniers carrying 32L each fit the bill well, and have already survived several slow drops with the full weight of the bike on them.
Tank bag – I went with a Giant Loop product, which is waterproof, big enough for my camera, Gopro and other items, and also zips off easily so the whole unit can be carried around, instead of having to empty it of valuables if leaving the bike.
B&B luggage rack – this alloy plate sits behind the seat and gives you a place to strap on a bag across the back.
Seat Concepts comfortable seat cover – any DR650 owner will tell you one of the worst things about the stock bike is its seat. Narrow, hard, and quite painful for anything more than a few hours, it had to go. I’ve also added a sheepskin cover for even more comfort.
GSXR exhaust – another terrible stock item is the exhaust. The factory unit is a bulky, heavy, and very restrictive item. Strapping on a unit off a K1-K2 GSXR1000 is the solution, although they’re getting very hard to find. Titanium means it’s less than half the weight (great when I’m loading up those same points on the frame with luggage), being from a superbike means it flows better, so when combined with a jetting kit provides more power and torque, and best of all, it’s still stamped Suzuki, so it would be easy to claim to the authorities that it was a factory option and so must be legal!
Tool tube – the standard bike has a tiny tool carrier mounted opposite the exhaust. Replacing it with a piece of 3″ poly pipe allows me to carry more tools, including a proper set of tyre levers.
Braided brake line – with the extra weight the bike is carrying, braking performance is not up to scratch. Adding a braided line improves the pressure in the line and should prove more durable in the long term.
Lowered Pivot Pegs – Being a lanky person (6’2) means that dropping the footpegs by an inch reduces the bend in my legs and is more comfortable over long distances. While replacing them, I changed the pegs to a Pivot style, which makes standing and offroad riding easier and less fatiguing.
SPOT Tracker – this ingenious little device is what powers the “Where am I?” tab of the site – it pings the Satphone network with my GPS location every hour, providing the tracking function you see, but it also has an SOS function to act like an EPIRB if I run into trouble – meaning that even without phone reception, I can call for help.